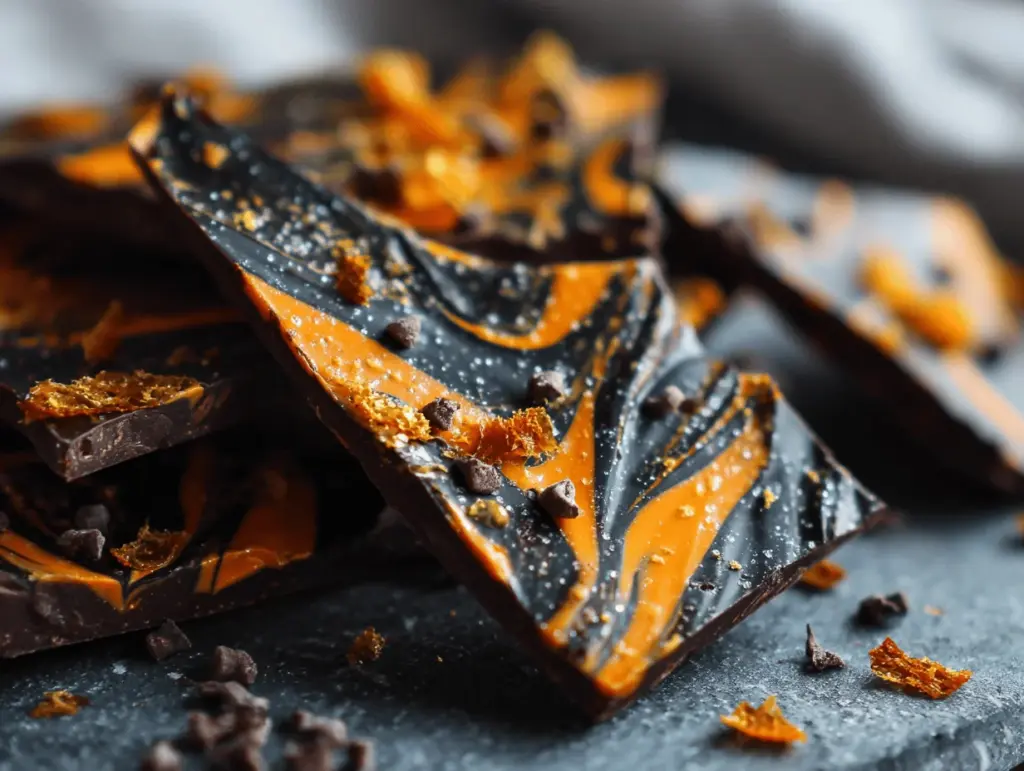
Picture the snap of glossy black chocolate, swirled with fiery orange streaks and sprinkled with citrusy zest — that’s the magic of my Orange & Black Chocolate Bark. The first time I made this, it was a chilly October evening, and I’d set out to make something that looked as bold as it tasted. Honestly, the smell of melted chocolate mixed with candied orange peel had me hovering over the pan way before it was set.
There’s something about chocolate bark that feels fancy, but let’s face it: this Orange & Black Chocolate Bark is as easy as stirring and pouring. If you love the drama of color (especially for Halloween or autumn parties), but you want something gourmet, this recipe is your ticket. I’ve played around with different chocolates, toppings, and even citrus oils — and after a dozen batches, this combo is the one I keep coming back to.
Whether you’re prepping for a Pinterest-worthy Halloween spread, need a quick edible gift, or just want a snack that’s not the usual, you’ll adore how this bark comes together. It’s decadent, a little mysterious, and the orange flavor cuts through the richness in the best way. I’ve tested it on kids who adore color, adults who crave gourmet treats, and it’s always a hit. As someone who’s obsessed with creative desserts, I can promise you: Orange & Black Chocolate Bark is a show-stopper for taste and looks. Let’s get into the bold flavors and how you can make this treat your own.
Why You’ll Love This Recipe
If you’re anything like me, you want a recipe that’s both stunning and simple. Orange & Black Chocolate Bark nails both, and I’ve got the kitchen stories to prove it. I’ve tested this bark with various chocolates, tried out zests and oils, and even let my little nephew help swirl the colors. Every time, it’s the bark that gets eaten first.
- Quick & Easy: Ready in under 30 minutes (plus chill time). Perfect for last-minute party treats or when a craving hits.
- Simple Ingredients: No need for specialty stores — you probably have most ingredients already.
- Perfect for Halloween: The bold orange and black colors make this bark a standout on any spooky treat table. Looks amazing on Pinterest boards, too.
- Crowd-Pleaser: Kids are mesmerized by the colors, while adults love the sophisticated citrus twist.
- Unbelievably Delicious: The bittersweet black chocolate meets bright, fragrant orange for a flavor combo that’s anything but basic.
What makes this Orange & Black Chocolate Bark different? It’s all about using real orange zest and a tiny splash of orange extract for punchy, natural flavor. I blend the chocolate with a touch of coconut oil for a glossy finish — learned that trick after one too many dull batches! The swirling technique is simple but turns out gorgeous every time, even if you’re not a pro decorator.
This isn’t just another bark recipe. It’s the one that has people asking for seconds and the recipe card. It’s comfort food, but with a grown-up twist, and honestly, it’s so easy you’ll wonder why you ever bought store-bought bark. If you want to impress without stress, this is your go-to treat — perfect for gifting, parties, or sneaking a piece with your afternoon coffee.
What Ingredients You Will Need
This recipe uses a handful of bold, easy-to-find ingredients to create a treat that’s both beautiful and delicious. If you keep chocolate and citrus in your pantry, you’re basically halfway there. Each ingredient plays a role — from the snap of the chocolate to the zing of the orange.
- For the Chocolate Bark:
- 8 oz (225g) bittersweet black chocolate (70% cocoa or higher, chopped; I love Valrhona or Ghirardelli for a glossy finish)
- 4 oz (115g) white chocolate (high quality, chopped; for vibrant orange coloring)
- 1 tbsp (15ml) coconut oil (refined or unrefined, helps smooth melting and adds shine)
- For the Orange Swirl:
- 1/2 tsp orange extract (or zest of 1 large orange for punchy natural flavor)
- Gel orange food coloring (a few drops; I use Wilton or Americolor for bold shades)
- 1 tbsp candied orange peel (finely chopped, optional but highly recommended for texture)
- 1 tsp fresh orange zest (adds extra aroma — microplane is your friend here!)
- For Garnishing:
- 1/4 cup mini chocolate chips (optional, for extra crunch)
- Pinch of flaky sea salt (Maldon is my go-to — brings out the chocolate flavor)
- Sprinkles or edible glitter (optional; for those party vibes)
If you’re dairy-free, swap regular white chocolate for a vegan version. You can use orange oil instead of extract, but go lightly — it’s potent! For a gluten-free treat, just double-check your chocolate (most are safe, but it’s worth reading labels). Honestly, the recipe is forgiving. I’ve substituted dark chocolate with semisweet in a pinch, and even swapped coconut oil for butter once — both worked fine.
For sourcing, I usually grab chocolate from the baking aisle, but specialty stores offer those deep, inky black chocolates that really pop. If it’s citrus season, go wild with fresh zest. In summer, you could even swap in lemon or blood orange for a twist. The toppings are totally customizable — that’s half the fun.
Equipment Needed
- Baking sheet (rimmed, about 9×13-inch or 23x33cm works best)
- Parchment paper (makes cleanup a breeze; foil works in a pinch but can stick)
- Heatproof bowls (for melting chocolate; glass or metal)
- Small saucepan (if you prefer stovetop melting)
- Microwave (optional, for quick melting)
- Rubber spatula or offset spatula (for swirling and spreading — offset gives you more control, but I’ve used a regular spatula plenty of times)
- Spoon or toothpick (for creating the marble effect)
- Microplane or zester (for fresh orange zest)
If you don’t have a baking sheet, a large cutting board or serving tray lined with parchment works. I’ve melted chocolate in a microwave-safe bowl for years — just use low power and stir every 30 seconds. For specialty equipment, like an offset spatula, a butter knife is fine for swirling if you’re careful. I always keep my parchment paper in a drawer for bark recipes; it’s reusable if you’re gentle. Budget tip: Dollar stores often have decent spatulas and bowls that last ages.
Preparation Method
- Prep the Pan: Line a baking sheet (9×13-inch or 23x33cm) with parchment paper, making sure it covers the sides. This prevents sticking and keeps cleanup easy.
- Melt the Black Chocolate: Place chopped black chocolate and 2 teaspoons (10ml) coconut oil in a heatproof bowl. Melt in the microwave in 30-second bursts, stirring well after each, until smooth and glossy (about 1-2 minutes). Alternatively, melt over a double boiler on the stovetop (medium-low heat), stirring constantly. If chocolate seizes, add 1 teaspoon coconut oil and keep stirring.
- Melt White Chocolate: In another bowl, melt the chopped white chocolate with the remaining coconut oil, using the same microwave or double boiler method. Stir until completely smooth. If the white chocolate looks grainy, add a tiny splash more coconut oil.
- Add Orange Flavor: To the melted white chocolate, stir in orange extract (or zest) and a few drops of orange gel food coloring. Keep adding coloring and stirring until the shade is bold and vibrant. (A little goes a long way!)
- Spread the Black Chocolate: Pour the melted black chocolate onto the lined pan. Use a spatula to spread it evenly, about 1/4-inch (6mm) thick. Don’t worry if it’s rustic — a little unevenness adds character.
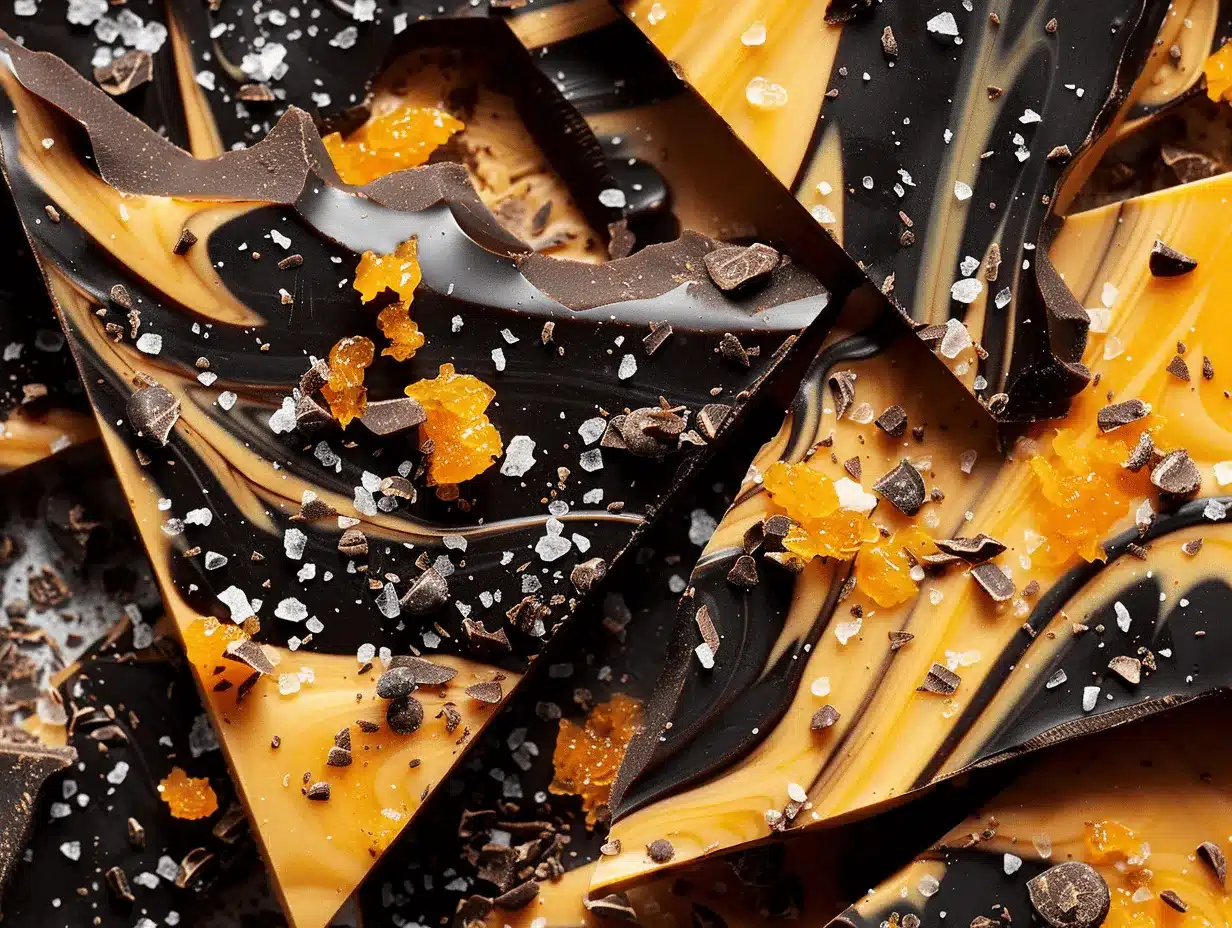
- Add the Orange Swirl: Spoon dollops of orange white chocolate over the black base. Use a toothpick, spoon handle, or spatula to gently swirl the orange through the black, creating a marbled effect. Work quickly, as chocolate starts to set fast. Swirl as much or as little as you like — it doesn’t need to be perfect!
- Top and Garnish: Sprinkle on candied orange peel, extra orange zest, mini chocolate chips, and a pinch of flaky sea salt. Add sprinkles or edible glitter for extra sparkle, especially if you’re making this for a party.
- Set the Bark: Chill the pan in the refrigerator for 40-60 minutes, or until fully hardened. If you’re impatient (like me), check after 30 minutes; it should be firm to the touch and snap when broken.
- Break and Serve: Once set, lift the bark from the pan using the parchment edges. Break into shards with your hands or cut with a sharp knife. Aim for uneven pieces — they look more artisanal.
Preparation note: If your chocolate isn’t melting smoothly, check for moisture in the bowl (dry is key!). For a super-glossy finish, temper the chocolate by cooling and reheating slightly, but honestly, the coconut oil shortcut works wonders. The swirling step is fun for kids (and adults) — don’t stress about symmetry. If bark sticks to the pan, let it sit at room temp for a minute before lifting. I always save the prettiest shard for myself!
Cooking Tips & Techniques
Over the years, I’ve learned a few tricks to get Orange & Black Chocolate Bark just right. Sometimes, my first batch was a little streaky or lacked that snap — but a few tweaks made all the difference.
- Melt Slow, Stir Often: Chocolate burns fast. Use low heat and stir every 30 seconds (microwave) or constantly (stovetop). If it seizes, a teaspoon of coconut oil usually saves it.
- Dry Bowls Only: Any water in the melting bowl will ruin your chocolate’s texture. I learned this the hard way after a rainy-day baking session.
- Coloring Matters: Use gel-based food coloring for vibrancy without thinning the chocolate. Water-based color can make chocolate clumpy.
- Swirl Gently: Over-swirl and you’ll lose those bold streaks. I aim for three or four big swirls, then stop — more marbling, less blending.
- Chill, Don’t Freeze: Refrigerate the bark until set. Freezing can cause condensation, making bark sticky.
- Break, Don’t Cut: For rustic pieces, break the bark by hand. If you want clean lines, score lightly with a knife first. I do both, depending on my mood!
- Batch Efficiency: Melt chocolates side-by-side in the microwave if you have two bowls. Saves time and keeps everything warm for swirling.
If you’re multitasking during party prep, bark is forgiving — just don’t let the melted chocolate sit too long, or it’ll firm up before swirling. After a few batches, you’ll get the hang of timing. My tip: Prep toppings while chocolate melts, so you’re ready to decorate while everything is still soft.
Variations & Adaptations
One of my favorite things about Orange & Black Chocolate Bark is how easy it is to customize. Here are some fun twists I’ve tried and loved:
- Dairy-Free: Use vegan white chocolate and double-check your bittersweet chocolate. Coconut oil works for melting both.
- Nutty Crunch: Sprinkle toasted almonds, hazelnuts, or pistachios on top for extra bite. I once added crushed pecans — so good with the orange!
- Spiced Up: Add a pinch of ground cinnamon or cardamom to the black chocolate for a warm, autumnal flavor.
- Seasonal Citrus: Swap orange for blood orange or lemon zest for a different vibe. Lemon gives a zingy freshness that’s great in spring.
- Flavor Boost: Mix in a dash of espresso powder to the black chocolate for a mocha undertone. I did this for a grown-up Halloween party — big hit!
- Allergen-Friendly: For nut allergies, stick with seeds (pumpkin or sunflower) or leave toppings out entirely.
- Different Cooking Methods: If you don’t have a microwave, the double boiler works perfectly. I’ve even melted chocolate in a slow cooker — just keep it on low and stir often.
My personal favorite? Adding a layer of crushed freeze-dried raspberries before chilling — the tartness with orange and chocolate is wild. Don’t be afraid to make this bark your own. That’s half the fun!
Serving & Storage Suggestions
Serve Orange & Black Chocolate Bark straight from the fridge for the best snap. I love arranging shards on a pretty platter with extra orange zest sprinkled around — it looks Pinterest-perfect and smells incredible.
- Serving Temperature: Cold is best for clean breaks and glossy finish. Room temp is fine, but bark may soften after a while.
- Presentation: Stack bark pieces in a glass jar or cellophane bags for gifts. Tie with an orange ribbon for Halloween or autumn vibes.
- Complementary Dishes: Pair with spiced cider, black tea, or a citrusy cocktail. Bark also makes a great addition to dessert boards with fruit and nuts.
- Storage: Store in an airtight container in the fridge for up to 2 weeks. For longer storage, freeze in layers separated by parchment for up to 2 months.
- Reheating: Don’t reheat bark — it melts! If bark softens, chill it again for a few minutes to restore snap.
- Flavor Development: The orange flavor intensifies after a day or two in the fridge. Sometimes I prep bark a day ahead for max zing.
Honestly, the bark rarely lasts long in my house. I stash a few pieces in the back of the fridge just for myself — and they’re always the best ones!
Nutritional Information & Benefits
Per 1 oz (28g) serving, Orange & Black Chocolate Bark provides roughly:
- Calories: 160
- Fat: 9g
- Sugar: 14g
- Protein: 2g
Bittersweet chocolate is packed with antioxidants, which may help with heart health. Orange zest brings vitamin C, and coconut oil adds healthy fats. If you go dairy-free or gluten-free, just choose the right chocolate (most are naturally gluten-free, but check labels). The bark contains dairy (white chocolate) and may have nut traces if you add toppings.
Personally, I love this bark as a treat that feels indulgent but brings a little brightness from the citrus. It’s not an everyday snack, but it’s a better-for-you option compared to store-bought candy. Just remember, chocolate is best enjoyed in moderation — and with lots of joy!
Conclusion
Orange & Black Chocolate Bark is the treat you’ll want to make again and again — especially when you’re craving something bold, beautiful, and ridiculously easy. The colors, the snap, and that citrusy twist make it totally irresistible.
Don’t be afraid to play with flavors or toppings. Make it nutty, spicy, or swap out citrus to fit your mood. I keep coming back to this recipe because it’s the one that feels like a celebration every time.
If you give it a try, let me know! Drop a comment, share your photos, or tell me your favorite twist. Baking is always more fun when you share the joy. Happy swirling — and happy snacking!
FAQs
Can I use milk chocolate instead of black chocolate for the bark?
Absolutely! Milk chocolate gives a sweeter, creamier taste. Just swap the bittersweet chocolate with milk chocolate in equal amounts.
How do I make orange & black chocolate bark without orange extract?
Use extra fresh orange zest for flavor. You can also try a tiny bit of orange oil (just a drop or two).
What’s the best way to melt chocolate without burning it?
Use a microwave in short bursts, stirring frequently. Or melt slowly over a double boiler, never letting water touch the chocolate.
How far in advance can I make this bark for a party?
You can make it up to two weeks ahead! Store in an airtight container in the fridge and it’ll stay fresh and snappy.
Is this recipe suitable for kids to help with?
Yes! Kids love swirling the chocolate and adding toppings. Just help with the melting steps to keep things safe.
Pin This Recipe!
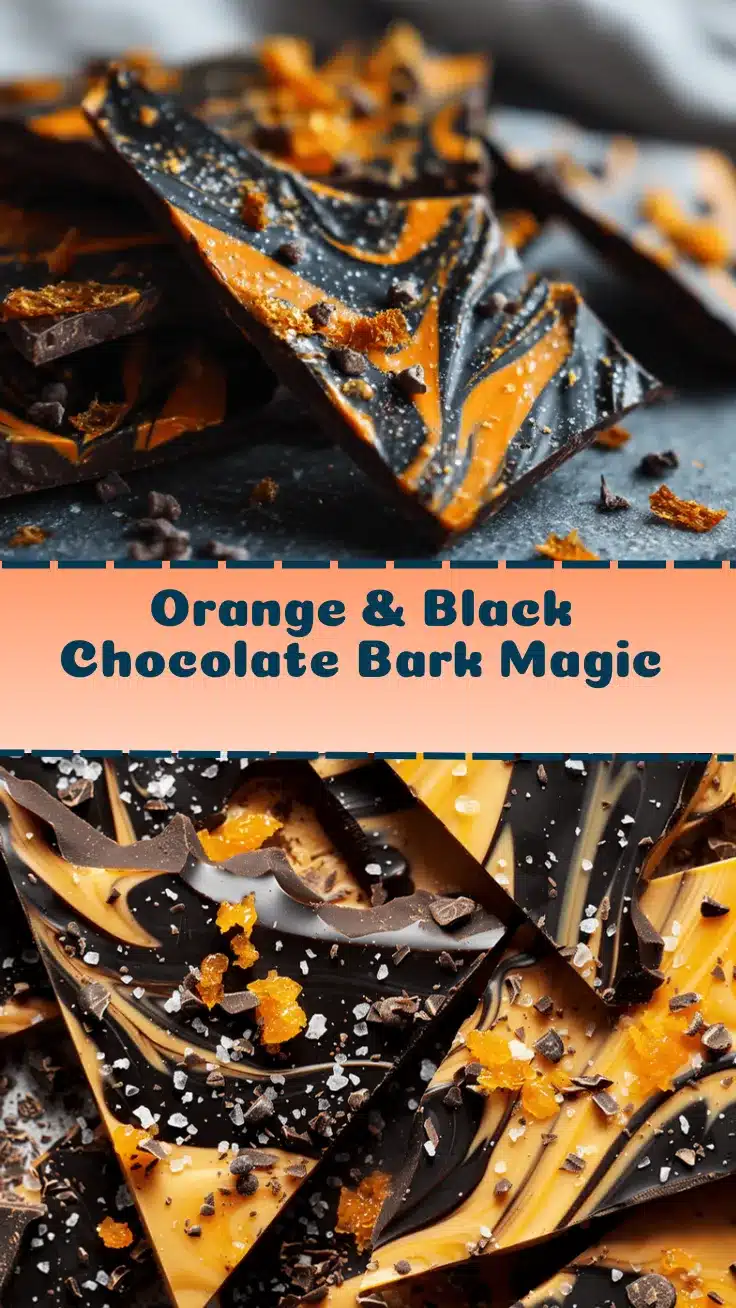
Orange & Black Chocolate Bark

This easy gourmet chocolate bark features glossy black bittersweet chocolate swirled with vibrant orange-tinted white chocolate, infused with real orange zest and extract. It’s a show-stopping Halloween or autumn treat that’s as bold in flavor as it is in appearance.
- Prep Time: 15 minutes
- Cook Time: 5 minutes
- Total Time: 1 hour
- Yield: 12 servings 1x
- Category: Dessert
- Cuisine: American
Ingredients
- 8 oz (225g) bittersweet black chocolate (70% cocoa or higher, chopped)
- 4 oz (115g) white chocolate (chopped)
- 1 tbsp (15ml) coconut oil, divided
- 1/2 tsp orange extract (or zest of 1 large orange)
- Gel orange food coloring (a few drops)
- 1 tbsp candied orange peel, finely chopped (optional)
- 1 tsp fresh orange zest
- 1/4 cup mini chocolate chips (optional)
- Pinch of flaky sea salt
- Sprinkles or edible glitter (optional)
Instructions
- Line a 9×13-inch baking sheet with parchment paper, covering the sides.
- Place chopped black chocolate and 2 teaspoons coconut oil in a heatproof bowl. Melt in the microwave in 30-second bursts, stirring after each, until smooth and glossy (1-2 minutes), or melt over a double boiler on medium-low heat, stirring constantly.
- In another bowl, melt the chopped white chocolate with the remaining coconut oil using the same method. Stir until smooth. If grainy, add a splash more coconut oil.
- Stir orange extract (or zest) and a few drops of orange gel food coloring into the melted white chocolate. Mix until the color is bold and vibrant.
- Pour the melted black chocolate onto the lined pan and spread evenly to about 1/4-inch thick.
- Spoon dollops of orange white chocolate over the black base. Swirl gently with a toothpick, spoon handle, or spatula to create a marbled effect.
- Sprinkle candied orange peel, extra orange zest, mini chocolate chips, and a pinch of flaky sea salt over the top. Add sprinkles or edible glitter if desired.
- Chill the pan in the refrigerator for 40-60 minutes, or until fully hardened.
- Lift the bark from the pan using the parchment edges. Break into shards by hand or cut with a sharp knife. Serve and enjoy!
Notes
For best results, use high-quality chocolate and gel food coloring for vibrant color. Ensure bowls are completely dry before melting chocolate to prevent seizing. Customize toppings as desired—nuts, seeds, or freeze-dried fruit work well. Store bark in an airtight container in the fridge for up to 2 weeks or freeze for up to 2 months. The orange flavor intensifies after a day or two.
Nutrition
- Serving Size: 1 oz (28g) piece
- Calories: 160
- Sugar: 14
- Sodium: 10
- Fat: 9
- Saturated Fat: 6
- Carbohydrates: 17
- Fiber: 2
- Protein: 2
Keywords: chocolate bark, Halloween dessert, orange chocolate, gourmet bark, easy chocolate treat, autumn dessert, edible gift, party snack, citrus chocolate, homemade candy



